The 15-Minute Post-Dive Rinse That Doubles Your Gear's Life
16 เมษายน 2569
Master the complete 15-minute post-dive rinse protocol for every piece of scuba equipment. From regulator dust caps to BCD bladder flushes, this step-by-step routine prevents corrosion and extends gear life.
Why Every Dive Ends With a Rinse, Not a Beer
Salt water is the silent destroyer of scuba equipment. Left to dry on your gear, it crystallizes into abrasive micro-deposits that corrode metal components, degrade rubber seals, and stiffen neoprene within weeks. A disciplined 15-minute freshwater rinse after every dive is the single most cost-effective maintenance habit you can adopt. It prevents 80% of gear failures, extends equipment life by years, and keeps your next dive safe. Here is the exact protocol, in the order that matters.
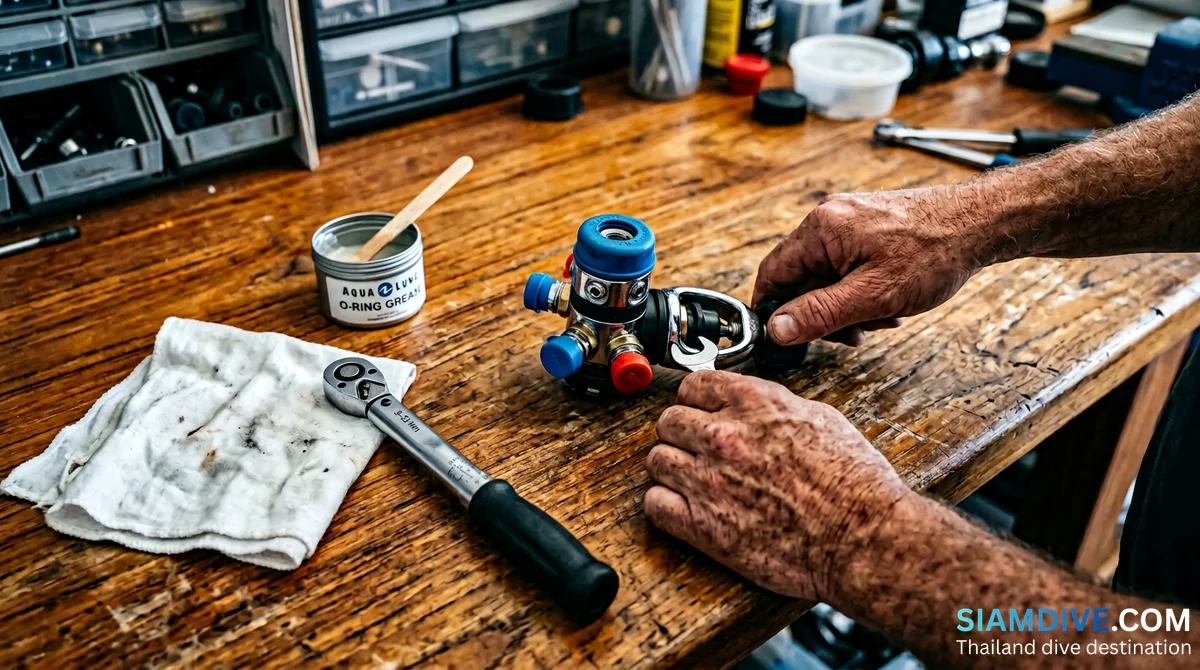
Step 1: Regulator First (3 Minutes)
Your regulator is the most expensive and most sensitive piece of equipment, so it gets rinsed first while your freshwater supply is cleanest.
- Secure the dust cap: Before anything touches water, confirm the dust cap is dry and firmly seated over the first-stage inlet. Water entering the first stage causes internal corrosion that leads to catastrophic failure.
- Gentle soak, not spray: Submerge the entire regulator assembly in a basin of fresh water for 1-2 minutes. Never blast it with a pressurized hose — high-pressure water can force past the dust cap or push debris into the second-stage diaphragm.
- Work the moving parts: While submerged, gently depress the purge button several times to flush the second stage. Swivel hose connections back and forth to dissolve salt deposits in the joints.
- Drain and air dry: Lift the regulator out, let it drain completely, and hang it in shade. Never dry it in direct sunlight — UV degrades the rubber hoses and mouthpiece.
Step 2: BCD Bladder Flush (3 Minutes)
The inside of your BCD is the most neglected area in dive gear maintenance. Salt water, sand, and biological residue accumulate inside the bladder and corrode the inflator mechanism from within.
- Dump first: Open all dump valves and drain any remaining dive water from the bladder.
- Fill through the inflator: Attach a hose to the oral inflator or simply pour fresh water directly into the mouthpiece. Fill the bladder about one-third full.
- Inflate and shake: Orally inflate the BCD fully, then vigorously shake and slosh the water inside to reach every internal surface and baffle.
- Invert and drain: Turn the BCD upside down so the inflator hose points downward, then open the oral inflator to drain. Repeat this fill-shake-drain cycle twice.
- Rinse exterior: Hose down all exterior surfaces, paying special attention to dump valve seats, buckles, and Velcro.
- Store partially inflated: Leave the BCD about half-inflated while drying to prevent interior surfaces from sticking together. Never leave it fully inflated in direct sun — heat expands the air and stresses bladder seams.
Step 3: Wetsuit, Hood, Boots, and Gloves (3 Minutes)
Neoprene is surprisingly fragile when mistreated. The way you rinse and dry your wetsuit determines whether it lasts one season or five.
- Turn inside out: Flip the wetsuit inside out before rinsing. Body oils, sweat, and bacteria concentrate on the interior lining. Rinse the inside thoroughly first.
- Cool freshwater soak: If possible, soak the suit in a tub of cool (never hot) freshwater for 15-20 minutes after your last dive of the day. Hot water breaks down neoprene cell structure and reduces flexibility permanently.
- Never wring: Gently squeeze excess water out by pressing the suit flat. Wringing twists and tears the neoprene cells, creating weak spots that crack over time.
- Hang correctly: Drape the suit folded at the waist over a wide, padded hanger or a thick horizontal bar. Never hang by the shoulders on a narrow hanger — the weight of water-logged neoprene stretches the shoulder area permanently. Same rules for boots, hood, and gloves: rinse inside and out, no wringing, dry in shade.
Step 4: Mask and Snorkel (2 Minutes)
Your mask lens has a factory-applied anti-fog coating on the interior surface that is easily destroyed by careless handling.
- Rinse in its own fresh water: Never dunk your mask in the same rinse bucket as your other gear. Wetsuit residue and sand in shared water scratch lenses and contaminate the silicone skirt.
- Gentle soap wash: Use a drop of baby shampoo or mild dish soap on the exterior of the lens and the silicone skirt. Avoid touching the interior lens surface with abrasive cloths or your fingers.
- Rinse the snorkel: Flush freshwater through the barrel and purge valve. Shake out trapped water.
- Store lens-up: Let the mask dry in its protective case or lens-up on a soft surface. Never store it with the strap stretched over the lens — this permanently warps the frame over time.
Step 5: Fins, Boots, and Dive Computer (2 Minutes)
These items are simpler but still need attention to specific areas.
- Fins: Rinse thoroughly, working the buckle mechanisms and spring straps back and forth under running water. Salt in the ratchet mechanism is the number-one cause of strap failure. Store fins flat — standing them upright warps the blades over time, especially full-foot fins.
- Dive computer: Rinse under gentle running fresh water. Use a soft brush (old toothbrush) to clean around buttons, sensors, and water-activated contacts. Salt residue on contacts causes false readings or failure to activate. Do not press buttons while submerged in rinse water on some models — check your manual, as this can allow water to enter the housing.
- Screen care: Wipe the screen gently with a microfiber cloth after drying. Avoid paper towels or rough fabric that can micro-scratch the display.
Step 6: Camera Housing and Tank Valve (2 Minutes)
If you dive with a camera, the housing requires its own rinse protocol that centers on O-ring integrity.
- Camera housing: Do not open the housing immediately after diving. Rinse the closed housing in fresh water first — any salt or sand on the exterior will fall directly onto the O-ring if you open it while still dirty. After rinsing and drying the exterior, open in a clean, dry area. Remove the O-ring, wipe the groove clean, inspect for hair or debris, and re-grease lightly.
- Tank valve: Rinse the valve area with fresh water to prevent salt buildup in the threads and handwheel mechanism. Grit in the valve makes it harder to turn and can eventually damage the valve seat. Stand the tank upright in shade to dry — never lay it on its side where it can roll.
Common Mistakes That Destroy Gear
Even experienced divers make these errors regularly:
- Pressurized hose on the regulator: A garden hose at full pressure can force water past the dust cap and into the first stage. Always use a gentle stream or a soak basin.
- Skipping the BCD interior flush: External rinsing looks clean, but the bladder interior is where corrosion silently destroys inflator mechanisms. Always flush inside.
- Hanging the wetsuit by the shoulders: Water-logged neoprene is heavy. A narrow hanger creates pressure points that permanently stretch and deform the shoulder area. Use a wide hanger or fold at the waist.
- Leaving the BCD fully inflated in sun: Heat expands trapped air, stressing bladder seams and dump valve seats. Partially inflate for drying, always in shade.
- Shared rinse buckets: One rinse bucket for all gear means your mask sits in a soup of sand, wetsuit chemicals, and salt. Give your mask and regulator their own clean water.
- Quick spray instead of soak: A 10-second spray leaves salt in every crevice. The water evaporates; the salt stays. A proper soak dissolves what a spray cannot reach.
Fifteen minutes. That is all it takes to protect thousands of dollars in equipment and ensure your next dive starts with gear you can trust. Build this routine until it is automatic — your gear will reward you with years of reliable service. For more diving tips and gear guides, visit siamdive.com.